Difference between revisions of "Laser Cutter"
From
FriedZombie (Talk | contribs) (tossed old settings) |
|||
| Line 165: | Line 165: | ||
* Mirror € 80,= | * Mirror € 80,= | ||
* Lens 38 mm € 250,= | * Lens 38 mm € 250,= | ||
| − | |||
| − | |||
| − | |||
| − | |||
| − | |||
| − | |||
| − | |||
| − | |||
| − | |||
| − | |||
| − | |||
| − | |||
| − | |||
| − | |||
| − | |||
| − | |||
| − | |||
| − | |||
| − | |||
| − | |||
| − | |||
| − | |||
| − | |||
| − | |||
| − | |||
| − | |||
| − | |||
| − | |||
| − | |||
| − | |||
| − | |||
| − | |||
| − | |||
| − | |||
| − | |||
| − | |||
| − | |||
| − | |||
| − | |||
| − | |||
| − | |||
| − | |||
| − | |||
| − | |||
| − | |||
| − | |||
| − | |||
| − | |||
| − | |||
| − | |||
| − | |||
| − | |||
| − | |||
| − | |||
| − | |||
| − | |||
| − | |||
| − | |||
| − | |||
| − | |||
| − | |||
| − | |||
| − | |||
| − | |||
| − | |||
| − | |||
| − | |||
| − | |||
| − | |||
| − | |||
| − | |||
| − | |||
| − | |||
| − | |||
| − | |||
| − | |||
| − | |||
| − | |||
| − | |||
| − | |||
| − | |||
| − | |||
| − | |||
| − | |||
| − | |||
| − | |||
| − | |||
| − | |||
| − | |||
| − | |||
| − | |||
| − | |||
| − | |||
| − | |||
| − | |||
| − | |||
| − | |||
| − | |||
| − | |||
| − | |||
| − | |||
| − | |||
| − | |||
| − | |||
| − | |||
| − | |||
| − | |||
==Visicut== | ==Visicut== | ||
| Line 295: | Line 188: | ||
* and your good to go! | * and your good to go! | ||
| − | |||
| − | |||
| − | |||
| − | |||
| − | |||
| − | |||
| − | |||
| − | |||
| − | |||
| − | |||
| − | |||
| − | |||
<pre> | <pre> | ||
Revision as of 22:29, 17 May 2016
Contents
Usage
Don't use the following materials :
- MDF,
- PVC plastic of other material containing chlorine,
- Teflon or other materials containing fluorine,
- Rubber,
- Not recommended Polycarbonate (also known as Lexan, it produces a ugly edge and smokes like crazy).
If you are not sure you can use this diagram to identify the material
ALWAYS keep an eye on your job when the laser is working. Don't leave it unattended.
After each use clean the laser (lens and mirror) with a cotton swab and aceton, do not exert pressure on the lens while cleaning.
Preparation
- Download Visicut, in version 1.7.9-51 or later you can download under menu 'Options --> Download recommended settings : Select "Netherlands, Enschede: TkkrLab"'
- For older versions of visicut, download setting for TkkrLab
- Start visicut and use menu 'Extra --> Install Inkscape Extension'
Steps
Turn on the laser
Switch on the wall & emergency button on the laser.
Put in the material
The table have to be on the right height, on the right there is a red line, the top of the material should align to this red line.
Check settings
Find the right settings of the material you want to use.
CHECK table with settings (power and speed)
Visicut
In Inkscape make something you want to cut. If you have your design done use men 'Extensions --> Lasercut path --> Open in Visicut'
For instructions of visicut check FabLab Berlijn
Select the right material and use the settings table for the right power/speed.
Use EXECUTE to start the laser cutter job.
| Visicut settings | |||
|---|---|---|---|
| Material | Speed | Power | Number of times |
| Poplars plywood (populieren triplex) 3.5mm | 10 | 100 | 1 |
| Birch plywood 6mm | 4 | 100 | 1x? |
| Acrylic, black 2mm | 10 | 100 | 1 |
| Acrylic,transparent 2mm | 20 | 100 | 1 |
| Acrylic, transparent 3mm | 10 | 100 | 1 |
| Acrylic, transparent 4mm | 10 | 100 | 2 |
Burn
Clean the lens and mirror after each job or at least once a day. Use cotton stick with aceton and lightly brush the surface of the mirror/lens.
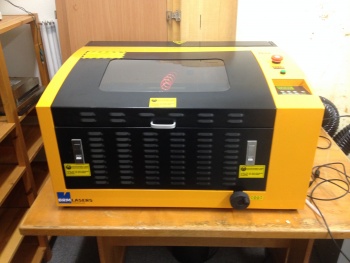
Specifications
- New brains Smoothie board
- Software compatible : Visicut, Inkscape
- Port : IP
- Item Code: CW3040
- Working Table Size: 300 *400mm
- Laser Tube : CO2 glass Tube
- Laser Power : 40W
- Cutting Speed : 0-2000 mm/min
- Engraving Speed : 0-3000mm/min
- Resolution : ±0.05mm /1000DPI
- Motor : Stepper
- Power Voltage : AC 110-220V±10%,50-60Hz
- Working Environment : 0-45? 5-95% (humidity)
- Power consumption : 300W (Total)
- Table type : Aluminum (Optional upon needs)
- Coolingmode : Water-cooled system
- Cutting thickness : 3-4mm (upon materials type)
- Rotary device : optional
- Packing Size : 123*79*60cm
- Gross Weight : 77/kg
No longer valid
- Software compatible : CorelDraw,AutoCAD,Photoshop
- Software : CorelDraw (Direct Output)
- Support Fils : BMP,HPGL,PLT,DST and AI
- Port : USB 2.0 Plug and play
Controller board
No longer in use we replaced this with a Smoothie clone board.
- Lihuiyu Studio 6C6879-LASER-M2:6 board from http://www.3wcad.com/
- Firmware : 2015.02.15
Included Software
- LaserDRW
- Corel Draw driver (you need Corel Draw, this is NOT included)
External Links
If you want to improve the laser check the following links
Box makers
Maintenance
Clean the lens and mirror after each job or at least once a day. Use cotton stick with aceton and lightly brush the surface of the mirror/lens.
Keep the rods oiled (no WD-40)
I (Duality) Quote:
Never use wd-40 as a lubricant. The primary ingredients in wd-40 are kerosene and mineral spirits, which can be corrosive and are otherwise not suitable for mechanical lubrication.
Also you don´t want a (wd-40) sprayed mirror ;).
focusing: link
how to maintain a laser cutter: maintenance
Water Cooling
If you need to replace the water in the water cooling replace it with Demi water with 10% antivries (in case the room can get < 0c).
Air Filter
- Transport keep it upright (or let it rest 96 hours).
Replacement parts
- Laser tube around € 500 (should last between 4000 hours (if you use always full power) - 10000 hours (if you only use engraving).
- Replacement Air filter : cost € 85 for active carbon, € 200 for the rest (285 of the whole filter)). Expected life 2 years
- Mirror € 80,=
- Lens 38 mm € 250,=
Visicut
leg je matteriaal in de lasercutter. Zorg ervoor dat het rode streepje aan de zijkant op dezelfde hoogte is als de bovenkant van je object
Doe de klep nu dicht!
stel het vermogen in op de lasercutter (zie materialenlijst)
druk op start in de engraving manager
De lasercutter gaat nu cutten
Wacht totdat hij klaar is. Let er op dat het materiaal niet gaat vlammen.
Stel het vermogen in op 0%, nu mag de klep open
Inkscape
There is no direct support to use this laser with inkscape, but there is a workaround. You can save to windows .emf file (on mac and windows), this format can be read with LaserDRW. HOWEVER:
- Using a line width of < 0.13 mm in your designs will result in some of your cutting lines dashed. Using a line width > 0.13 will make the cutter cut all your lines twice. Pick your poison.
Notes:
- all the paths made in the inkscape file will be followed, so even if you used masks or other things, it is NOT WISIWIG!
- you can only save to .emf in inkscape in windows. (for linux, you can use the .wmf format, tested)
- works great what to do to make it work, get the latest version from the inkscape websited, the one in the repo's is way to old and doesn't support saving as .emf
- if installed open inkscape make your design save it as .emf, be sure to tick the boxs saying: Convert dashed/dotted lines to single lines.
- make sure that your design has the stroke set to 0.001 mm or else it will do double cute edges.
- and your good to go!
Dubliner,
I had the same problem on my Vytek.
It's all in the alignment and the point where the beam passes through the nozzle below the focus lens.
The beam (on mine) was grazing the nozzle and reflecting off.
It takes a VERY in-depth alignment procedure to correct this. Take your time, bring a lunch.
Wish I'd bought a Multicam.
