Difference between revisions of "Arcade RetroPie"
From
| (9 intermediate revisions by the same user not shown) | |||
| Line 2: | Line 2: | ||
|ProjectName=Arcade RetroPie | |ProjectName=Arcade RetroPie | ||
|Owner=Zeno4ever | |Owner=Zeno4ever | ||
| + | |Status=100% | ||
| + | |Skillz=Laser Cutter, 3D printer | ||
| + | |Summary=Arcade joystick with RetroPie (on Raspberry Pi 3) | ||
}} | }} | ||
=Goals= | =Goals= | ||
| Line 9: | Line 12: | ||
For the case i created my own, you will find here the corner parts and lasercut files. The case is made of 2 mm acrylic plate, to be honest this is to thin to be sturdy enough, so I made the top plate stronger to added a wood 3 mm top plate and add a 'rib' in de middel of the joystick. With this the joystick feels sturdy enough. | For the case i created my own, you will find here the corner parts and lasercut files. The case is made of 2 mm acrylic plate, to be honest this is to thin to be sturdy enough, so I made the top plate stronger to added a wood 3 mm top plate and add a 'rib' in de middel of the joystick. With this the joystick feels sturdy enough. | ||
| + | |||
| + | If you want to see this joystick in action you can see it at makerspace [https://twenspace.nl TwenSpace] | ||
==Needed parts== | ==Needed parts== | ||
* [[:File:RetroPieArcadeJoystick.zip|Lasercut parts]] | * [[:File:RetroPieArcadeJoystick.zip|Lasercut parts]] | ||
* [https://www.thingiverse.com/thing:2495918 3D printed corner brackets] | * [https://www.thingiverse.com/thing:2495918 3D printed corner brackets] | ||
| − | * | + | * [http://www.dx.com/p/zero-delay-arcade-game-machine-diy-parts-for-raspberry-pi-3b-2b-b-455820?Utm_rid=92935131&Utm_source=affiliate Joystick set] (incl. USB controller) |
| − | * [http://www. | + | * [http://www.dx.com/p/raspberry-pi-3-model-b-cortex-a53-quad-core-board-w-1gb-ram-green-426431?Utm_rid=92935131&Utm_source=affiliate RaspberryPi 3] + [http://www.dx.com/p/geekworm-dc-5v-3a-power-adapter-with-switch-for-raspberry-pi-eu-plug-454137?Utm_rid=92935131&Utm_source=affiliate 5V 2.5A power supply] with [https://retropie.org.uk RetroPie] image |
* 16 x M4 short screws for all the panels and 4 x M3 or M4 long (I used 60mm) | * 16 x M4 short screws for all the panels and 4 x M3 or M4 long (I used 60mm) | ||
* 4 x rubber feet for under the joystick | * 4 x rubber feet for under the joystick | ||
* optional electronics for controlling the LEDS | * optional electronics for controlling the LEDS | ||
| + | |||
| + | =Part 2= | ||
| + | I added active cooling (that I had laying around) and an [https://www.aliexpress.com/item/Dual-Port-USB-2-0-A-Male-to-Female-Extension-Screw-Lock-Panel-Mount-Cable-30cm/32839312798.html external USB connector]. To fit it all I had to adjust the backplate. | ||
<gallery mode="packed-hover"> | <gallery mode="packed-hover"> | ||
| Line 27: | Line 35: | ||
File:RetroPieJoyStick_ledcontroller_top.jpg|LedController | File:RetroPieJoyStick_ledcontroller_top.jpg|LedController | ||
</gallery> | </gallery> | ||
| − | |||
=Emulations= | =Emulations= | ||
| Line 51: | Line 58: | ||
You can find more informatie on | You can find more informatie on | ||
* [https://retropie.org.uk RetroPie] the main emulation software for Raspberry Pi | * [https://retropie.org.uk RetroPie] the main emulation software for Raspberry Pi | ||
| + | * [https://www.recalbox.com/ Recalbox] alternative for RetroPie, haven't used yet. | ||
* [https://github.com/ehettervik/es-runcommand-splash loading splash screens] | * [https://github.com/ehettervik/es-runcommand-splash loading splash screens] | ||
| + | * [http://www.slagcoin.com/joystick/introduction.html General information about arcade machines] | ||
| + | * [https://www.emuparadise.me Emu Paradise] | ||
Latest revision as of 19:29, 17 May 2019
| Project: Arcade RetroPie | |
|---|---|
| |
| Name | Arcade RetroPie |
| Initiator | Zeno4ever |
| Status | 100% |
| Skills | Laser Cutter, 3D printer |
| Summary | Arcade joystick with RetroPie (on Raspberry Pi 3) |
Contents
Goals
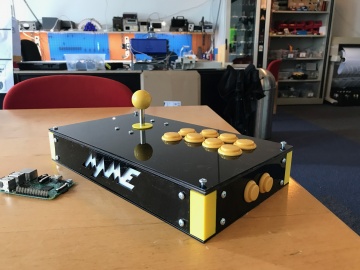
A emulation of the best games of the old retro machines on RetroPie, including Amiga and C64. My main purpose of this page is to direct you to the sources I found on the internet. This wil not be a step for step instruction, use your own brains ;-)
I use a Raspberry Pi 3 as hardware with RetroPie for all the emulation software.
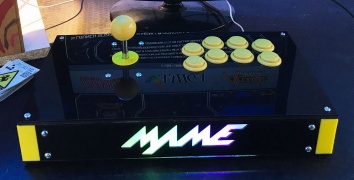
For the case i created my own, you will find here the corner parts and lasercut files. The case is made of 2 mm acrylic plate, to be honest this is to thin to be sturdy enough, so I made the top plate stronger to added a wood 3 mm top plate and add a 'rib' in de middel of the joystick. With this the joystick feels sturdy enough.
If you want to see this joystick in action you can see it at makerspace TwenSpace
Needed parts
- Lasercut parts
- 3D printed corner brackets
- Joystick set (incl. USB controller)
- RaspberryPi 3 + 5V 2.5A power supply with RetroPie image
- 16 x M4 short screws for all the panels and 4 x M3 or M4 long (I used 60mm)
- 4 x rubber feet for under the joystick
- optional electronics for controlling the LEDS
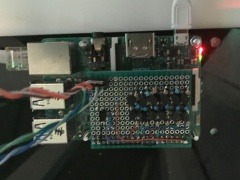
Part 2
I added active cooling (that I had laying around) and an external USB connector. To fit it all I had to adjust the backplate.
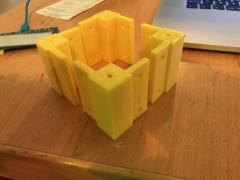
Custumizable Corners
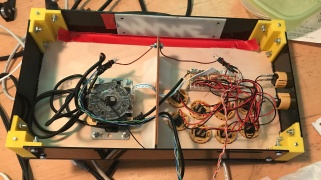
Inside of Joystick
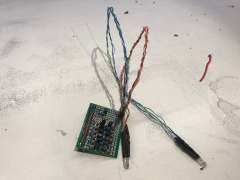
LedController
LedController
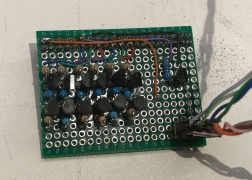
LedController
Emulations
Practical tips per emulation and where to find the ROMS.
Arcade
I use the default MAME emulation (mame2003) that use 0.78 roms, be sure you use the right ones
Amiga
- Amiberry
- WHDLoad to load games without the emulation GUI
- Amiga games?
Tip : You have to put your adf files in the roms/amiga-data/Games_ADF directory and download the files from whdownload, use 'Build amiga games' in the retropie setup menu to build startable games from the selection menu. Warning whit the default setup you can't exit the amiga emulation, this is still on my todo list to solve.
C64
- vice
SNES
- ROMS Roms from 6666 games
Atari 2600
- ROMS Roms from 6666 games
More Links
You can find more informatie on
- RetroPie the main emulation software for Raspberry Pi
- Recalbox alternative for RetroPie, haven't used yet.
- loading splash screens
- General information about arcade machines
- Emu Paradise
