OHM LEDS
From
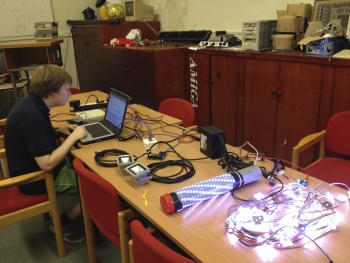
TkkrLab used the lights of OHM2013 on the following events :
- Gogbot Sept. 2013, Enschede
- TEC ART Feb 2014, Roterdam
- Green vibrations hemelvaart 2014, Enschede
This lights exist of
- LED strips / sleves
- Pixels
- Floodlights
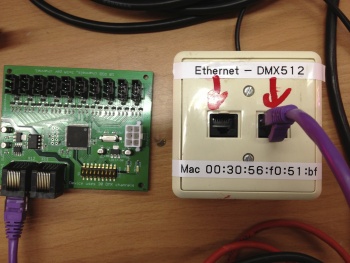
All can be controlled by ethernet/dmx For more info see OHM2013 site
To connect all the lamps these are connected over ethernet UTP cables where Art-Net packets (UDP in certain format) are send specification.
The UTP cables are connected to a loc_controller, that controls the LED strips.
You need a dhcp server in the network to give all the LOC_controllers a ip, tip of OHM LOC Team was to use the isc dhcp server[?]
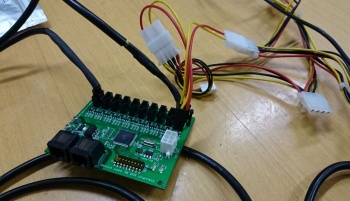
Hardware
LOC_Controller
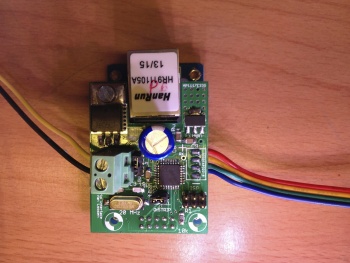
These controllers are specialy developed for OHM2013. They connect directly with ethernet and the LED strip of pixies.
There are 2 jumpers on the controller, be sure to have them righ or you might blow something up
- source code & pcb layout firmware controller)
- Sort -> for Pixies / O = Ledstrip
- 12V / 5V
response to universe 0 (broadcast) and their own ip number
LED strips
- 5m 150 LEDS
- 5V
Sleeve
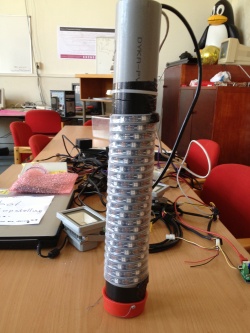
- the above LED strip wound on a PVC tube
- with power suply so you can connect this to 220V
- with loc_controller with ethernet cable so you can connect it directly to a switch
Pixels
![]()
- 12V - 2,64A
- 50 pixels on one strip
- can be controlled with a Loc_controller
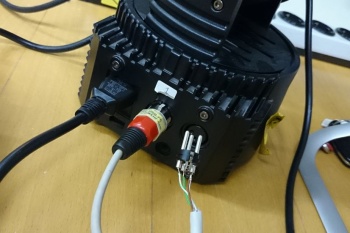
Floodlights
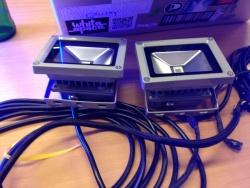
Specs: 12V powered 10W 5m cable 4 pin connector for +12V, R, G and B. Roughly 300mA per channel.
Floodlights Controller
IF YOU CONNECT THESE TO THE POWER BE SURE THAT BLACK/GND IS TO CENTER AND THE YELLOW/ +12V TO THE EDGE. FAILING TO DO SO BLOW UP THE DMX CONTROLLER!!!!
Control of these are a bit different : Converter ethernet --> DMX =UTPcable=DMX512 controller--> Lights Sourcecode, pcb layout on http://ohm.sa007.nl/ Remark of SA007 : het optocoupler deel is geupgrade van deze schema 's en de output connectors zitten 180 graden gedraaid
- DMX input
- 12V powered (compatible with ATX 1.x P4 connector)
- use a atmega169
- 100 Watt light
- 10x8cm, can control 10 lamps, isolated dmx bus, with 9 bit dipswitch
- max 1A PWM per channel,so max 30A on the whole board
OneDutchBrother has bought 2 controllers and several Floodlights, and is now experienced using the equipment. (Without Blow Up)
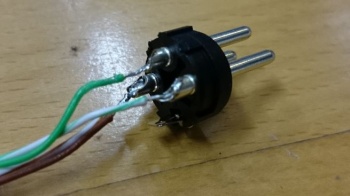
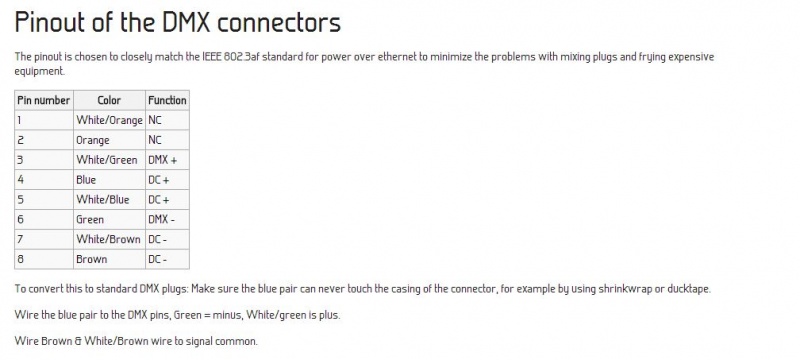
 Currently I use the wires without the use of the common ground on the DMX connector. So I only use DMX+ en DMX- wires.
https://ohm2013.org/wiki/Team:LOC/DMX_lighting (Plaatje van Overgenomen)
One of the troubles I have is that not only the the ATX 1.x P4 connector needs 12 Volt. Also the wires 4 and 7 needs 12 Volt, I used the same 12 Volt as the connected ATX 1.x P4 connector. If the setup has multiple controller board you could end up with Ground Loops.
End Result : Setup :
- Laptop met Freestyler op Windows O.s.
- USB - > DMX kabel (ENTTEC OPEN DMX Controller inclusief XLR Female)
- Showtec Microspot Led moving head (DMX address 31)
- Zelfgemaakt XLR Male naar RJ45
- ETH0 Floodlight controller board
- 2 Floodlights (op de eerste en op de laatste poort)
- 12 Volt uit een PC voeding op de Floodlight controller board (ON led brand continue groen)
- Dipswitch 1 op de Floodlight controller board op 1 gezet
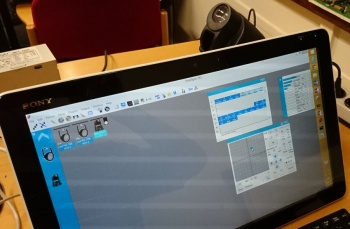
Software
First you need the set up a netwerk, use isc dhcp server.
With special software that send specific packets you can control the lights.
OHM software
- controlling
- example e.g. police mode art
TkkrLab software
- https://github.com/aprogas/py-gogbot-artnet Python implementation
code door Duality: (wat led patroontjes gemaakt door Duality zo als barpole random leds, random shifting leds)
- Freestyler (settings for OHM led lamps follows later)
Not tested yet but might be userfull http://www.solderlab.de/index.php/software/glediator
