Cnc machine
From
| Project: cnc machine | |
|---|---|
| 360x360px | |
| Name | cnc machine |
| Initiator | tkkrlab |
| Status | Actief |
| Skills | {{{Skillz}}} |
| Summary | bouw van cnc machine voor TkkrLab |
Contents
- 1 Zen CNC
- 1.1 Leveling the base
- 1.2 Some testing and milling with our new spindle
- 1.3 Who
- 1.4 Goal
- 1.5 Electronics
- 1.6 Firmware
- 1.7 Cad / Cam and other software
- 1.8 Add ons / Wishlist
- 1.9 (short) PCB milling instructions using eagle with gcode V3.6.4.2 or newer with the TkkrLab CNC (old)
- 1.10 PCB milling instructions using eagle with the TkkrLab CNC (new)
Zen CNC
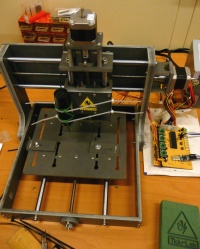
After some searching, debating and comparison we have decided to spend our 500 Euro budget on the Zen toolworks 7x7 CNC.
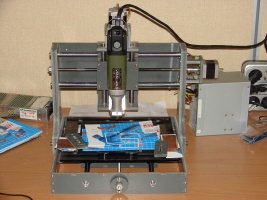
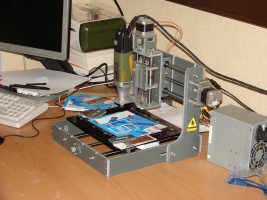
our machine with test setup:
PDF Manual or wiki
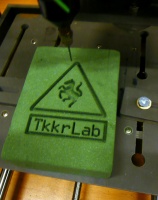
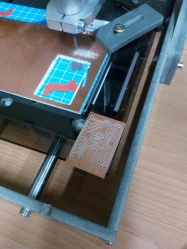
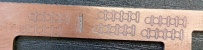
First tests with pen and 1mm drill as cutting tool:
 .
. .
.
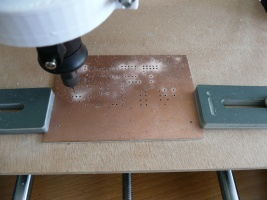
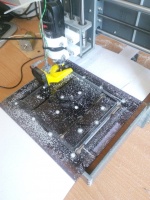
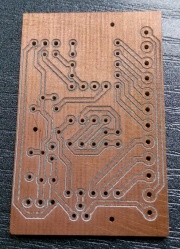
First Actual PCB drilling:
Leveling the base
Leveling of our pexiglass plate took 3 hours. We needed to add some aircooling to prevent melting the plastic. That happened during several tries before. The final result worked out quite well.
 Owls watching the slow process. Almost done.
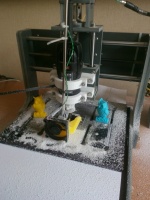
Some testing and milling with our new spindle

Current State:
Who
Goal
- CNC machine voor minstens XY as
- minder dan 500 Euro aan onderdelen
- kop: Dremel boor of extrudeer machine monteerbaar
- suitable for PCB-milling
Electronics
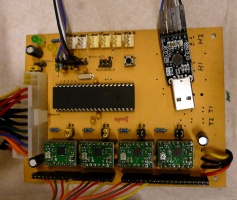
From many electronics options we have chosen to make reprap Generation 7 Electronics. It can drive 4 stepper motors (XYZ and one Extruder), is easy to build, uses common pololu stepper drivers and has many options including electronics for contolling heaters, endstops etc.
The finished electronics (parts for 3D printer left out):
Firmware
Currently we are testing with Teacup Firmware which is supposed to also work for CNC-milling. but the firmware lacks Arc support in Gcode so we might have to switch to Marlin or grbl.
- In the mean time we modified the Teacup firmware so it now supports arcs. The Arc code was taken from Marlin/GBRL and integrated / modified to work with teacup: File:Teacup-ARC-support-v1.0.zip
Cad / Cam and other software
We are testing some software for different purposes:
- Printrun, a utility to control steppers manualy and send gcode to machine
- ReplicatorG, an open source 3D printing program, also with gui to controll the steppers manualy
- GcodeTools plugin for Inkscape so we can use inkscape designs
- pcb-gcode plugin for Eagle for use with pcb milling
Free 3D Modeling Software
- Google SketchUp (requires the freeware plugin to export STL)
- Blender (GPL)
- Art of Illusion (GPL)
- TopMod3D (GPL)
- Wings3D (GPL)
- StructureSynth (GPL)
- OpenSCAD (GPL)
- Heekscad
- FreeCAD
Add ons / Wishlist
List of add ons and options for use with the CNC
- dremel flex shaft mount Peter has designed and printed a similar set of mounts but the flexible dremel shaft was a little bit too flexible. A new design was made and printed by Peter so the dremel is now mounted at the CNC directly.
- Proxxcon IBS/E precision milling tool suitable for SMD pcb milling (hier voor 90 Euro)
- adapter om de IBS/E op de zen toolworks te monteren
(short) PCB milling instructions using eagle with gcode V3.6.4.2 or newer with the TkkrLab CNC (old)
- Make sure the lower left corner of your board is at coaordinates x=0.0, y=0.0
- If you have a double sided board draw a hole of 1.0mm at x0, y0. This helps to allign the board after swapping sides.
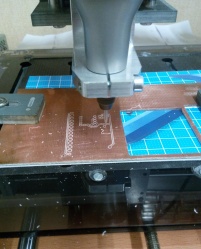
- If you want to cut out the board from the pcb after milling and drilling draw some 'wires' around your board in the milling layer (46). The with of the wires should the same with of the milling bit used to cut out the board (2mm is available for this at the moment). The dimention should be your PCB outline + radius of your milling bit.
- Check your board (DRC) with design rules file for eagle: File:Tkkrlab-CNC.zip (needs to be updated for the new settings below)
- Use the following settings File:Tkkrlab cnc20140730.zip for the gcode plugin (Download pcbgcode V3.6.2.4). inside the zip is a readme file that explains how to install and use these settings.
- when all is done split your bottom.drill file in seperate files for drill diameters 0,7mm 0,8mm and 1.0mm. Everything larger then 1.0mm should also be drilled with 1.0mm and can be manually drilled with a larger bit after your board is finished.
- Place your PCB material against the x-axis and set your home (0.0) position on the lower left on the pcb. If you cut out your board afterwards leave enough room for the mill bit you use for that
- Put a piece of scratch (but evenly thick) wood under your board so you not cut or drill into the bottom plate.
- for single side boards: bottom milling and after that use your splitted drill files to drill the holes using the correct drill bit for each file.
- for double sided boards: First drill a 1mm hole at 0.0. Then start top milling, wait until ready and then turn around your board and place it again agains the x-axis. Allign your board using your drilled hole and home the CNC to that. Start milling the bottom layer and finaly use your splitted drill files to drill the holes using the correct drill bit for each file.
- end cut out milling: Make sure the cnc is still aware of the correct coordinates (go to 0.0 and check if it at correct). Place the miling bit, home the Z axis and use the bott.mill file to cut out our board. (press the board down a bit when its almost finished and becomes loose).
PCB milling instructions using eagle with the TkkrLab CNC (new)
| download pcb-gcode-2.6.2.4 and unzip it in a new folder called "pcbgcode" in your Eagle directory. | 400px |
| download File:Tkkrlab cnc gcode settings.zip and unzip it in ../eagle/pcbgcode/settings/ | 400px |
| download File:Tkkrlab-CNC.zip and unzip it in ../ealge/dru/ | 400px |
| start eagle and draw a pcb or something. | 400px |
| If you want to cut out the board from the pcb after milling and drilling draw some 'wires' around your board in the milling layer (46). The with of the wires should the same with of the milling bit used to cut out the board (2mm is available for this at the moment). The dimention should be your PCB outline + radius of your milling bit. | 400px |
| If you are using a groundplane, set the isolation to minimal 0.6mm (right click polygon, properties) if it´s possible in your project. | 400px |
| check your pcb with the dru file you have placed in the ../eagle/dru/ directory. | 400px |
| press the ULP button and run ../eagle/pcbgcode/pcb-gcode-setup.ulp | 400px |
| Go to the plugins tab and select the settings file ../settings/saved/tkkrlab_cnc.def and click Load. | 400px |
| goto the GCode Style tab, select generic. | 400px |
| Go to the Machine tab and select the Default drill Rack file tkkrlab_cnc.drl | 400px |
| Maybe you want to change your drill depth at the Machine tab. And change the milling option (and depth) at the general tab. And press "accept and make my board". | 400px |
| You will get a picture of the gcode. Brown means that the CNC is passing that trace one time. Red means it´s passing it 2 times. (2 times is better) | 400px |
| If it´s fine, press Q. You will get new *.ngc files in your project directory. Move it to a USB stick. | 400px |
| Add "G00 X0 Y0" in every ngc file you have created after "G00 Z10.0000" (that´s before "M05") (it´s on the end of the file) | 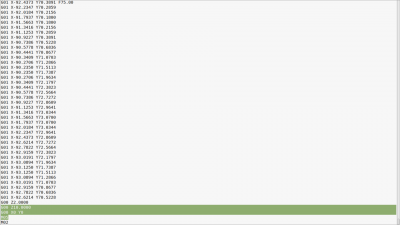
|
| Open *.bot.drill.ngc on your USB stick and check the tool sizes in the comments of the file. | 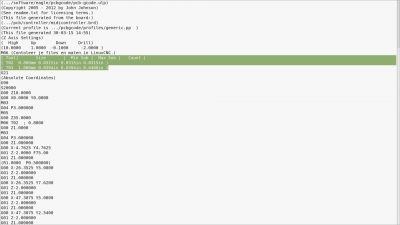
|
| If you want to drill al the holes with the same size, delete this part for every tool. (tip: ctl-f for the tools you have, for example: T02) | 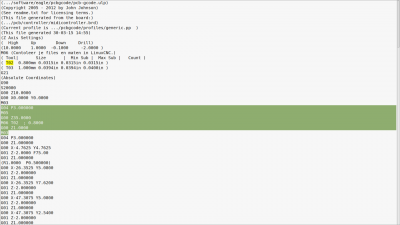
|
| If you want to drill with different sizes, split the file in different files, for each drill one file. And delete "M06 T0.. ; ....." | 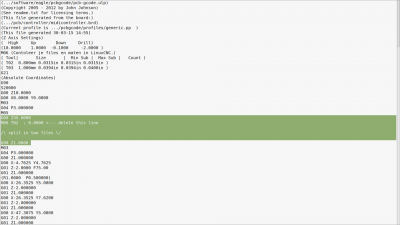
|
| Go to the cnc pc and put your USB stick into the pc. | 400px |
| coming soon |
